Add a Feature
You can add, modify and delete features to- and from your map. Once added you are able to use these user features as they where normal features. This solves the problem of missing aerodromes, navaids, waypoints etc.
Features we currently provide are:
- Waypoints (WPT)
- Aerodromes (AD)
- Non Directional Beacons (NDB)
- Instrumental Landing Systems (ILS)
- VHF Omnidirectional Range (VFR)
- Glide Slope (GS)
- Distance Measuring Equipment (DME)
Every feature needs specific input data.
To add a feature:
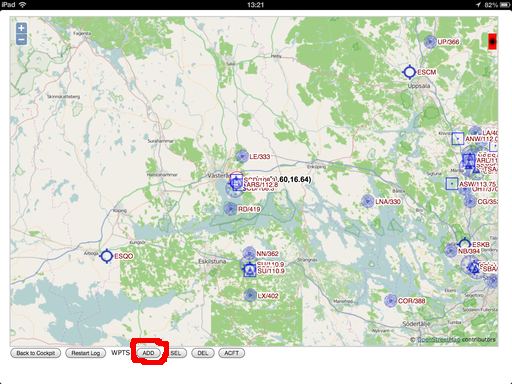
From the main screen first click on SIM
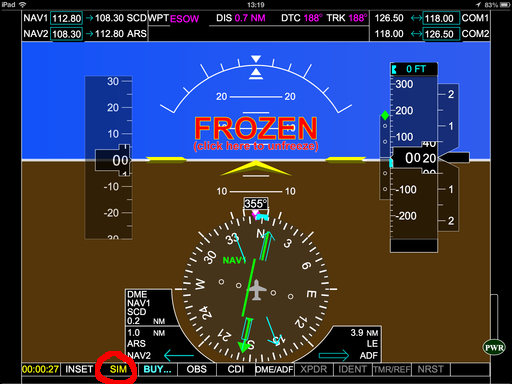
A new menu will appear on the lower very left side of the screen, there you click on the MAP
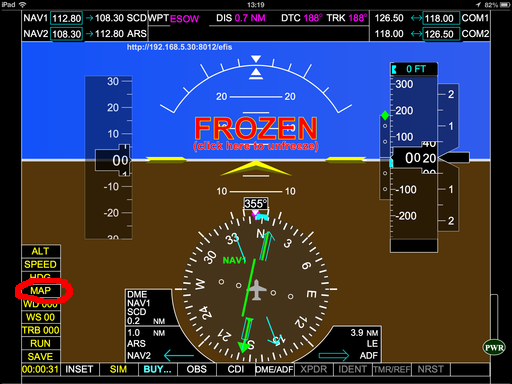
which opens the map in full screen mode:
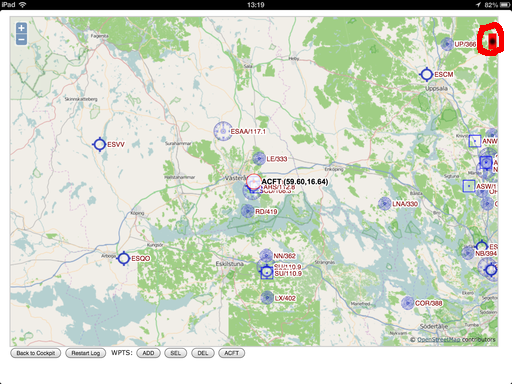
On the upper right side of the map there is a button you can click. It will open a menu allowing you to select the visibility of different layers.
For every feature there is a layer associated, so for example you do not want to clotter all the screen with waypoints you just de-select the waypoint layer and they will all be hidden.
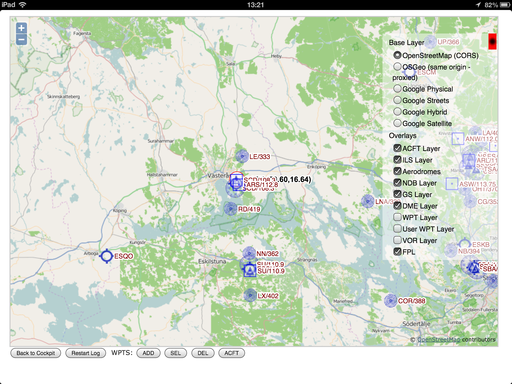
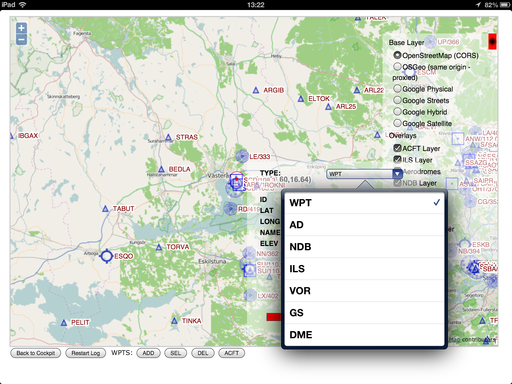
On the lower part of the screen you have the control buttons. Clicking on add would set it in addition mode, that means that on each click of on the map a popup menu will appear allowing you to input data for the creation of a new feature.
If you click on DEL it will put it in deletion mode, that means that when you click on a feature it will ask you to delete it.
If you click on SEL you will put it in selection mode. Clicking on a feature will open the same dialog you have when creating a feature and you will be allowed to modify a feature (you could for example modify the frequency of a VOR)
clicking on ACFT will put it back to its original mode, that is it will allow you to move around the aircraft and thereby reposition it.
In our example we want to add a feature, so you can click on ADD:
The popup menu will appear. If you click on WPT you get the selection list where you can choose which kind of feature you want to create. In our example we will create a Waypoint so we will leave it on WPT.
Depending on what kind of feature you choose, different input parameters are required. In case of a waypoint you have to specify its identifier, the latitude, longitude (they will default on the position you clicked on the map but you are allowed to change it here), the longitude, the name of the feature and its AMSL altitude expressed in feet.
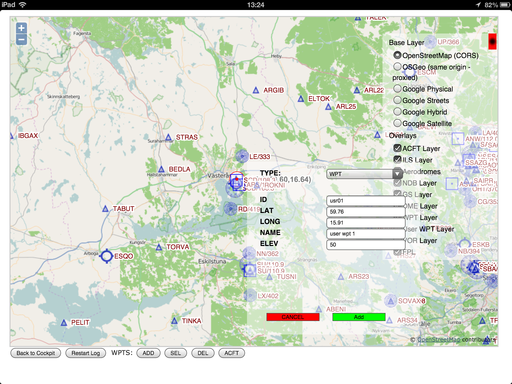
So you fill it out and then click on save.
Once saved, the waypoint will be visible on the map:
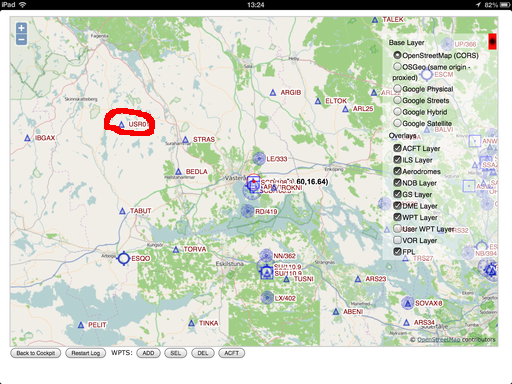
So now you just created a user waypoint which you can use for navigation either in real navigation or in the simulator.
To use the newly created waypoint:
go back to the cockpit. Since we created a waypoint we can not select it as NAV1 or NAV2 since it does not have a frequency, but you still can input it as a waypoint on the upper part of the cockpit:
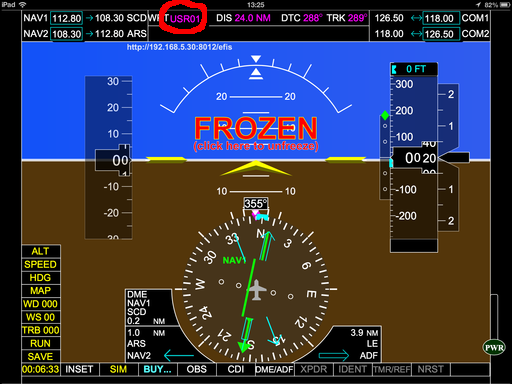
You would specify the identifier you just used. Note that identifiers should be unique, in any case if for some reason there are several stored with the same name it will pick up the one which is closer to the current position of the aircraft. In our case we used the identifier USR01
Then immediately the waypoint is loaded and distance, direct and track appear. Note there is no indication about the time left.
You can then navigate the usual way, for example by clicking twice on the CDI so that the purple (GPS) indication appears in the CDI:
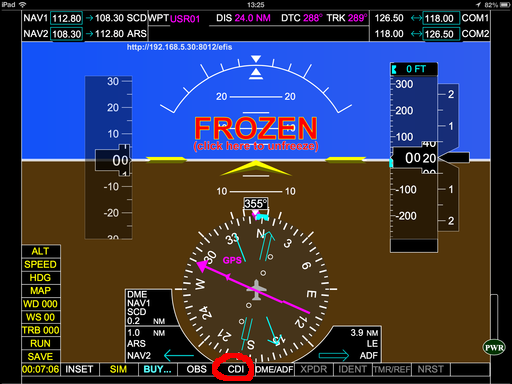
You can then change the OBS as it would be a VOR.